How to create high quality images
What is a High Quality Image?
A high quality image is one that:
- has a high enough resolution to display at a size appropriate for a desktop computer and;
- is focused, well-lit and well-framed.
The following tips are especially helpful for smartphone users, but can be applied to most cameras.
Portraits and Selfies
Lighting
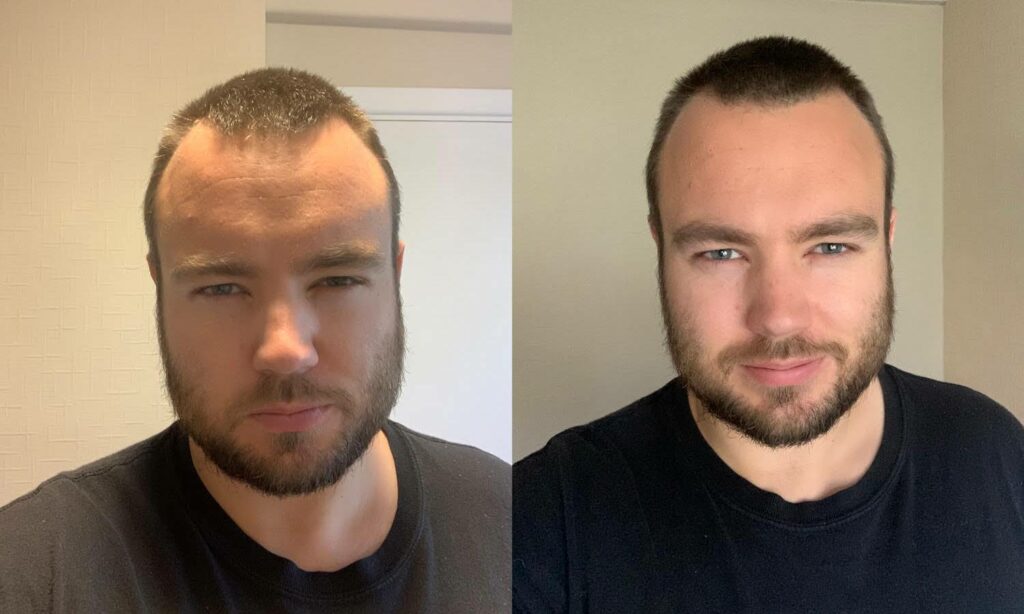
The kind of light you use will determine how good you look in a photo. Generally, you want to take photos in diffused light or light that is falling directly on your face. Harsh, angled, light (e.g. the sun at midday, overhead lighting) will create unflattering shadows on your face that distort your features. The easiest light to use is the light from a large window during the day. You can see an illustration of this difference in the two photos below:

Places with good lighting:
- Shaded areas during a bright, sunny day (note that the shade should be consistent, dappled shade can also produce inconsistent lighting results)
- In an alley, doorway, under a bridge, or in the shade of a building on a sunny day
- In the open on an overcast day
- Indoors facing a large window
- During the golden hour (the moments just before and after sunrise and sunset), facing the sun.
Places with bad lighting:
- In the open on a bright, sunny day
- Around midday on an overcast day
- Under overhead, indoor lighting
- Indoors away from a window or in a dark room
Position and Framing
Position yourself in front of a background that is fairly empty and/or neutral. Avoid highly patterned backgrounds, cluttered rooms, and backlit areas.
Set your phone on a surface or lean it against something (e.g. a stack of books, a shelf, a heavy bottle) and use the timer feature. This will allow you to relax and look at the camera, rather than trying to snap a photo and hold the camera out at the correct angle at the same time.
Generally the best angle for a selfie is just above your eye-line, angled slightly down, but experiment with what looks good to you. Most smartphone cameras are wide-angle, so the closer you are to the camera, the wider your face will look. Conversely, if you position yourself too far away, there will be less focus on your face and the image quality will suffer. Again, experiment with distance to find the right fit.
Tap on the screen to focus the camera on your face. For some smartphones, this will also change the exposure.
When you are ready to take the photo, look at the camera, not at your face on the screen.
Filters
We do not recommend using filters on your photos before sending them to us (or others) for publication online. Filters change the data makeup and resolution of your image file, and that may make it more difficult for us to post consistent images on our websites. In addition, if we are posting your image alongside others who have not used that filter, it is very obvious that you have altered the image and that tends to look unnatural.
If there is an element of your photo that you don’t like, let us know! We may be able to make professional edits that are more effective than a filter.
Sharing High Resolution Images
The best way to share a high resolution image from a mobile phone is via email while connected to a reliable wifi connection.
Other sharing options (e.g. text, iMessage, social media) automatically resize images, so the image will be sent at a smaller resolution. Sending images over a data connection or low-quality wifi connection risks your email client timing out before the photo has been completely uploaded.
Choose “Actual Size” when given the option to choose a size. If that option is not available, choose the largest option.