Upgrading to macOS Monterey (v. 12.0)
Overview
EdIT has removed restrictions on upgrading to macOS Monterey (v. 12.0) on SOE-owned and managed Mac computers. This article provides steps to follow to successfully upgrade the operating system on your computer and upgrade some settings so that your device will continue to function without issue on the UNC network and within Peabody Hall.
NOTE: The upgrade process will take approximately 45-60 minutes and you will not be able to use your device during the upgrade process.
Step #1 Back Up Your Device
Prior to starting the upgrade process, you should make sure that all data and files on your computer are backed up. You can do this by making sure all files are saved to a cloud or network storage location (Ex: Office 365 OneDrive). You can also accomplish this by connecting your external hard drive and making sure TimeMachine has completed a recent backup.
Step #2 Upgrading the UNC VPN Client
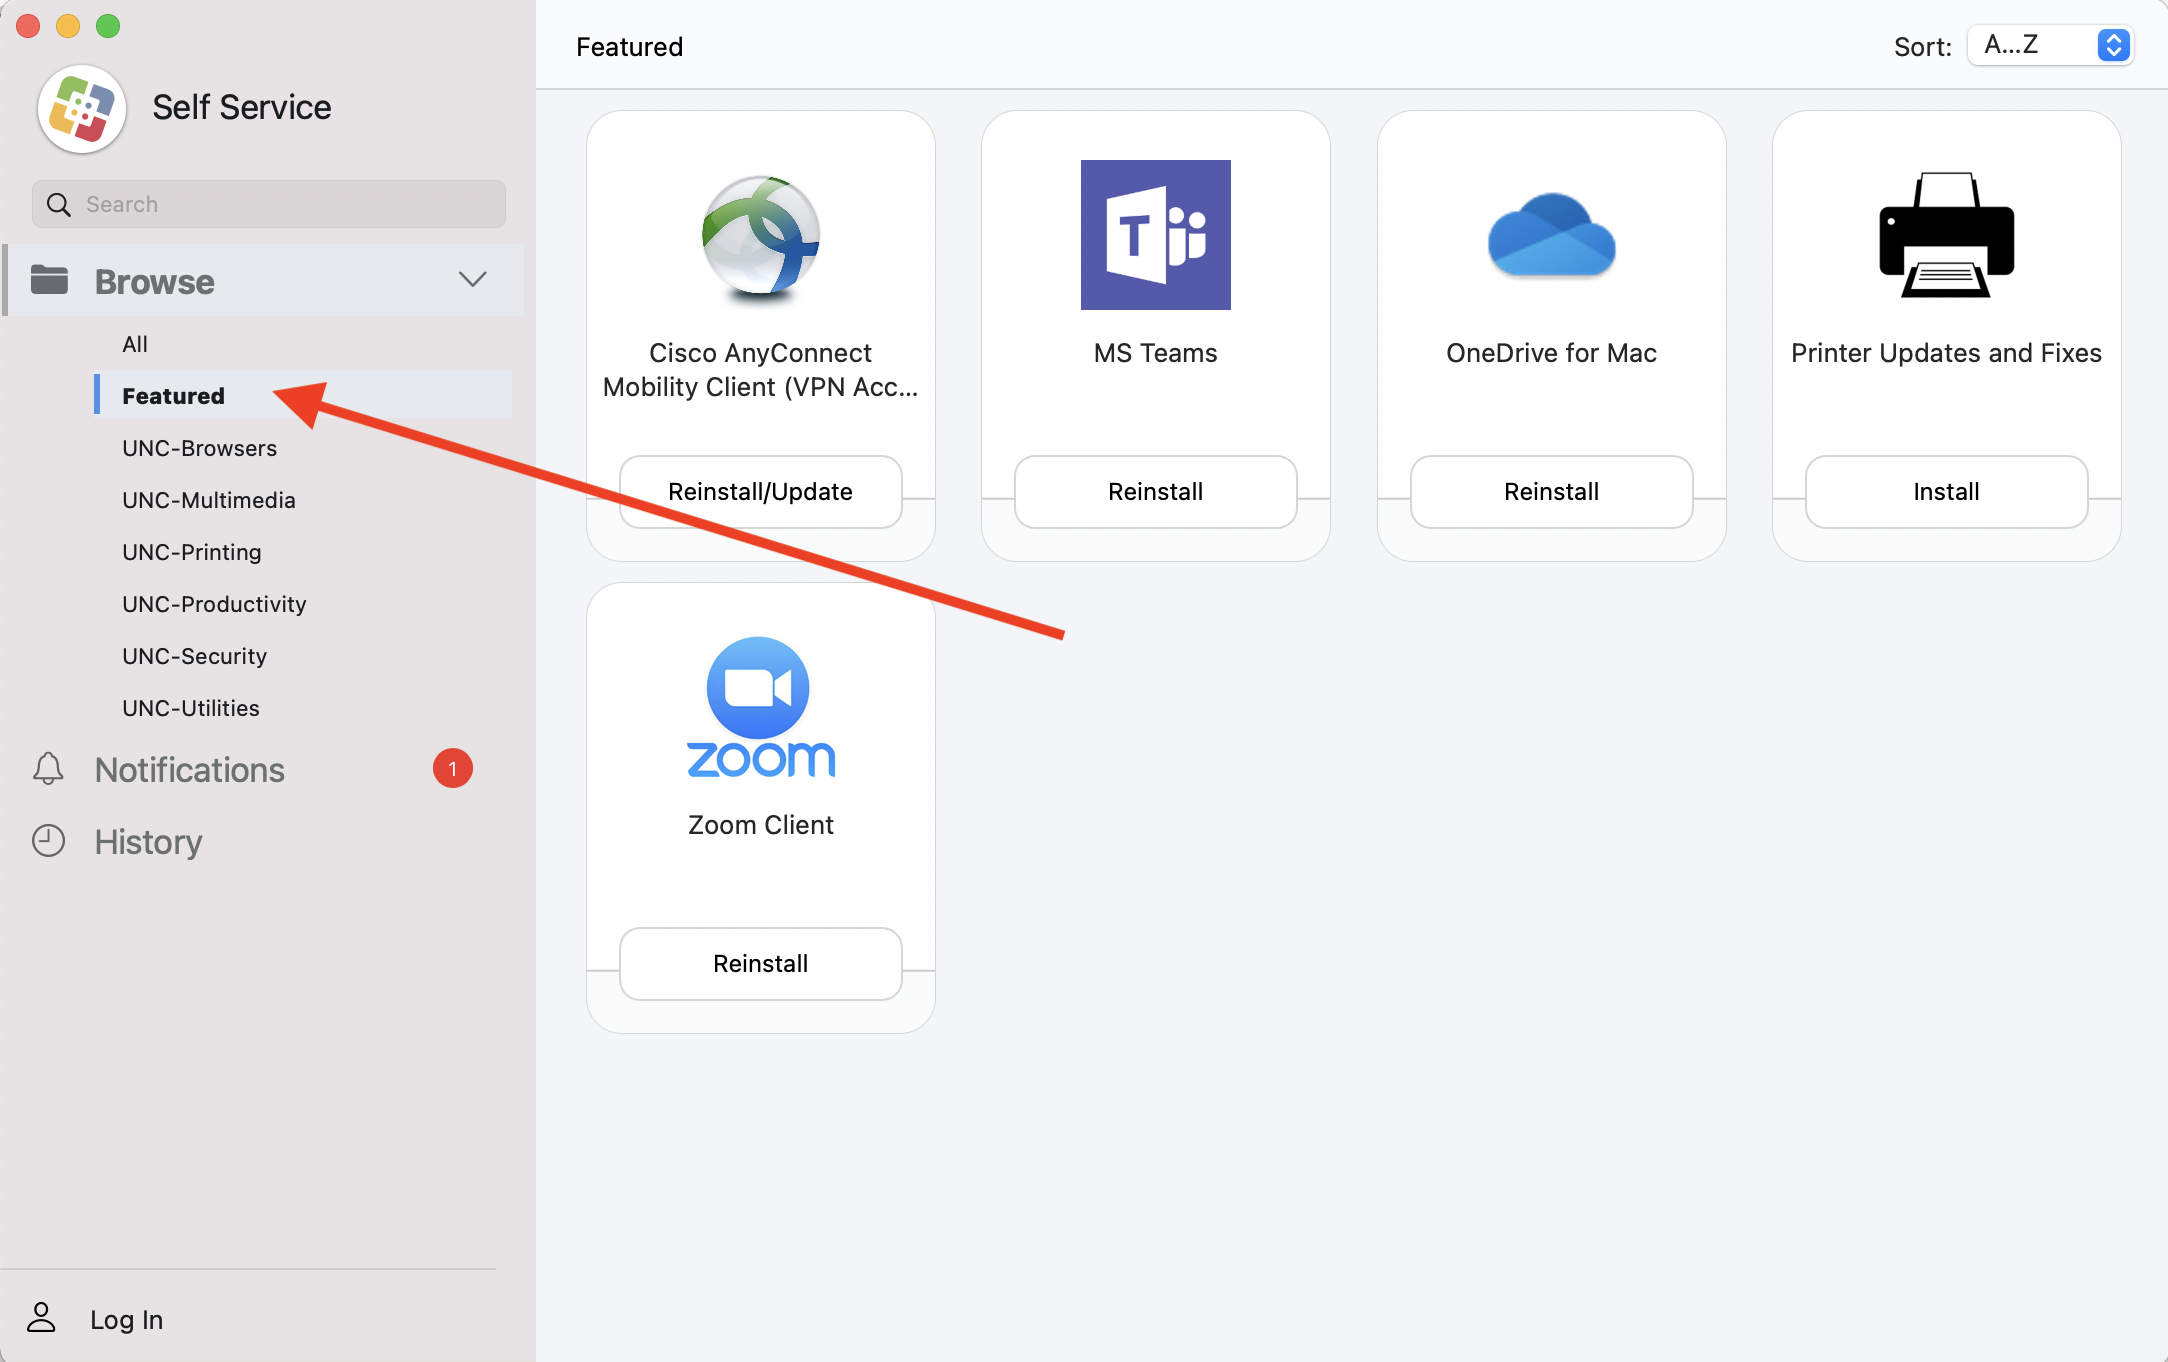
- Open the Self Service application on your computer. You can open this application by going to the Applications folder on your computer or by doing a spotlight search for Self Service.

- When the Self Service application opens, check to make sure you have the Featured menu selected on the left.
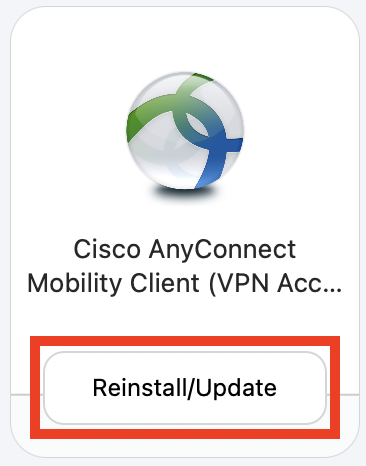
- Click the Reinstall/Update button under the Cisco AnyConnect Mobility Client icon. The client update will begin downloading and the button will return to the Reinstall/Update state when the update is complete.
Step #3 Initiating and Installing the Monterey Upgrade
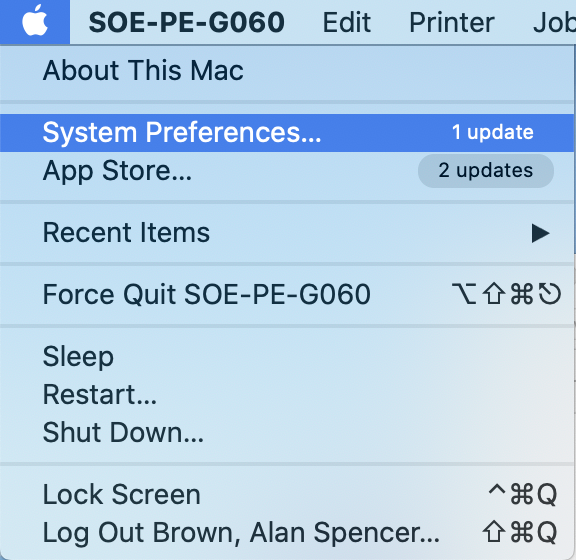
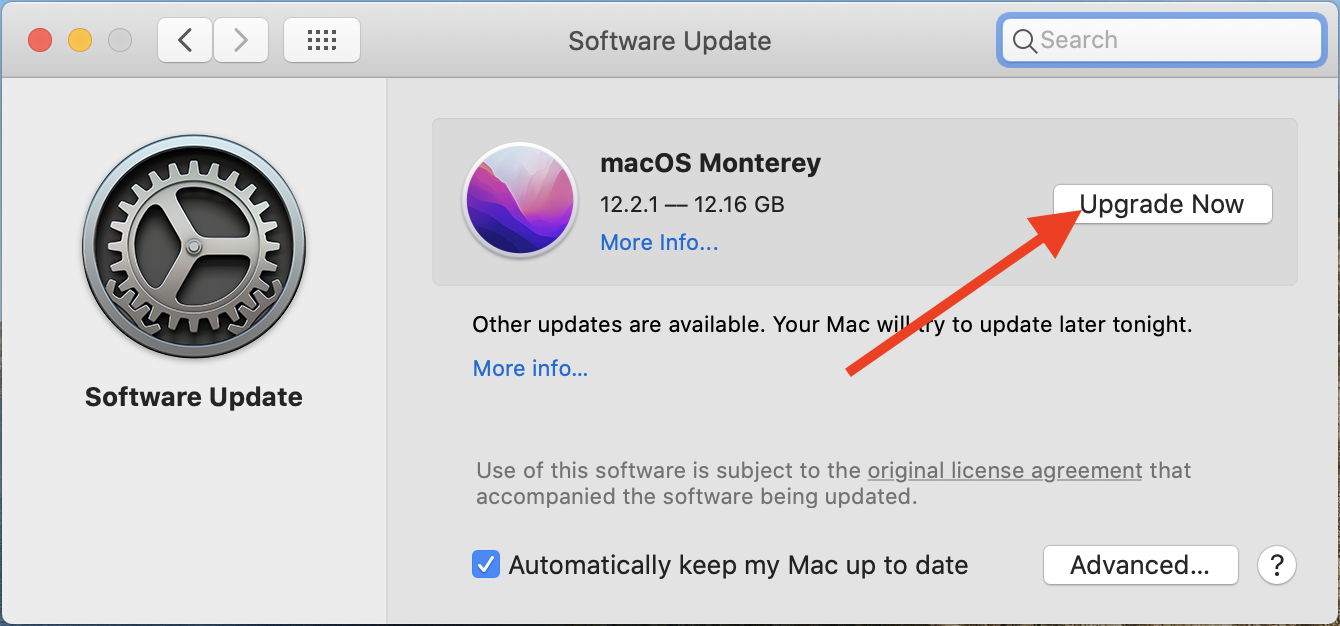
- Go to the Apple Menu at the top left of your screen, then choose System Preferences. The System Preference window will open.
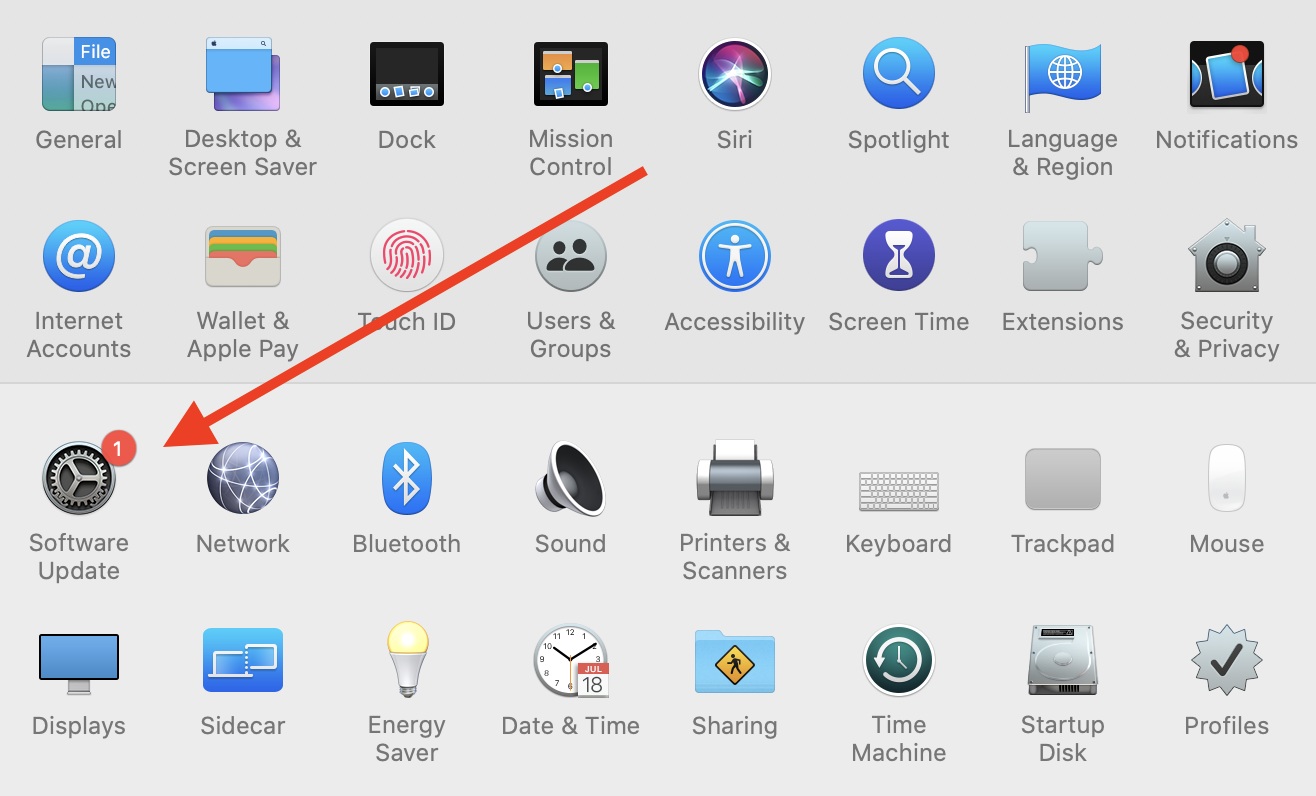
- Click the Software Update icon. The Software update preferences will open.
- Click the Upgrade Now button. The upgrade download process will begin.
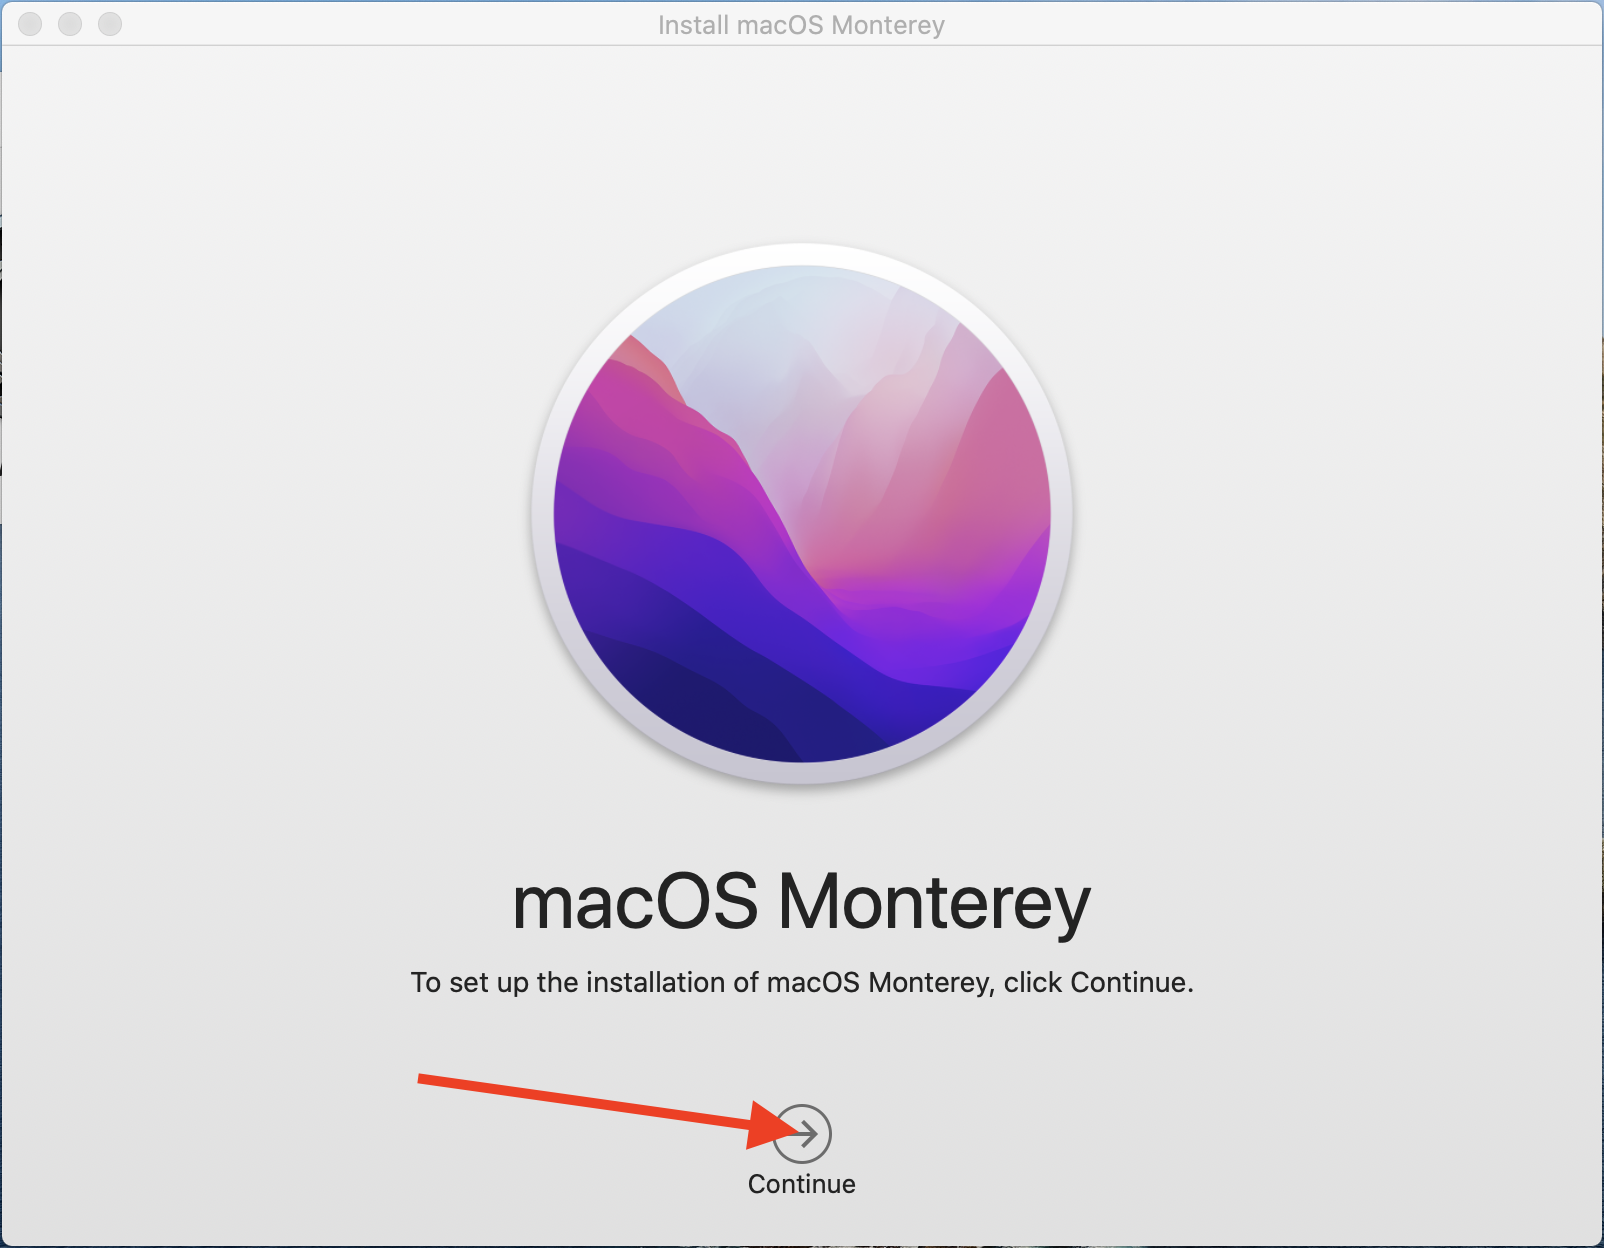
- Once the upgrade download process is complete a Install macOS Big Sur window will appear. Click Continue.
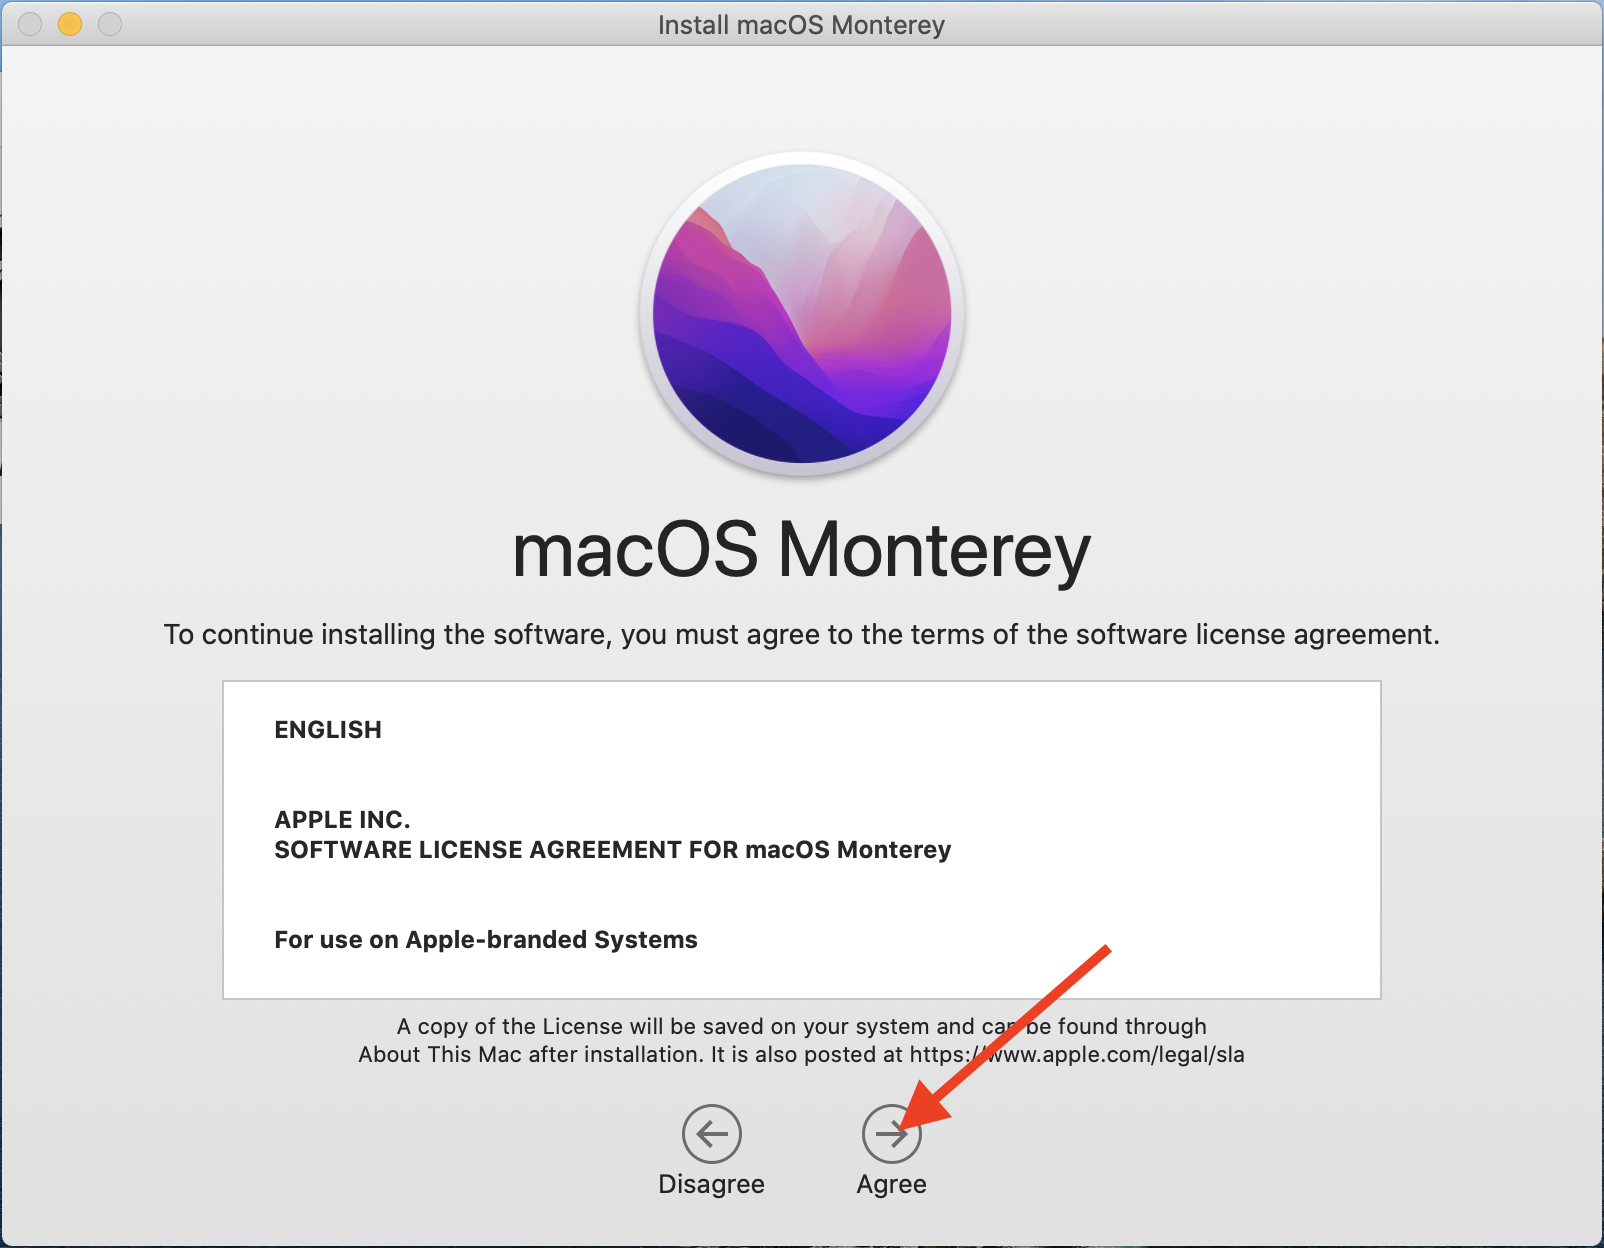
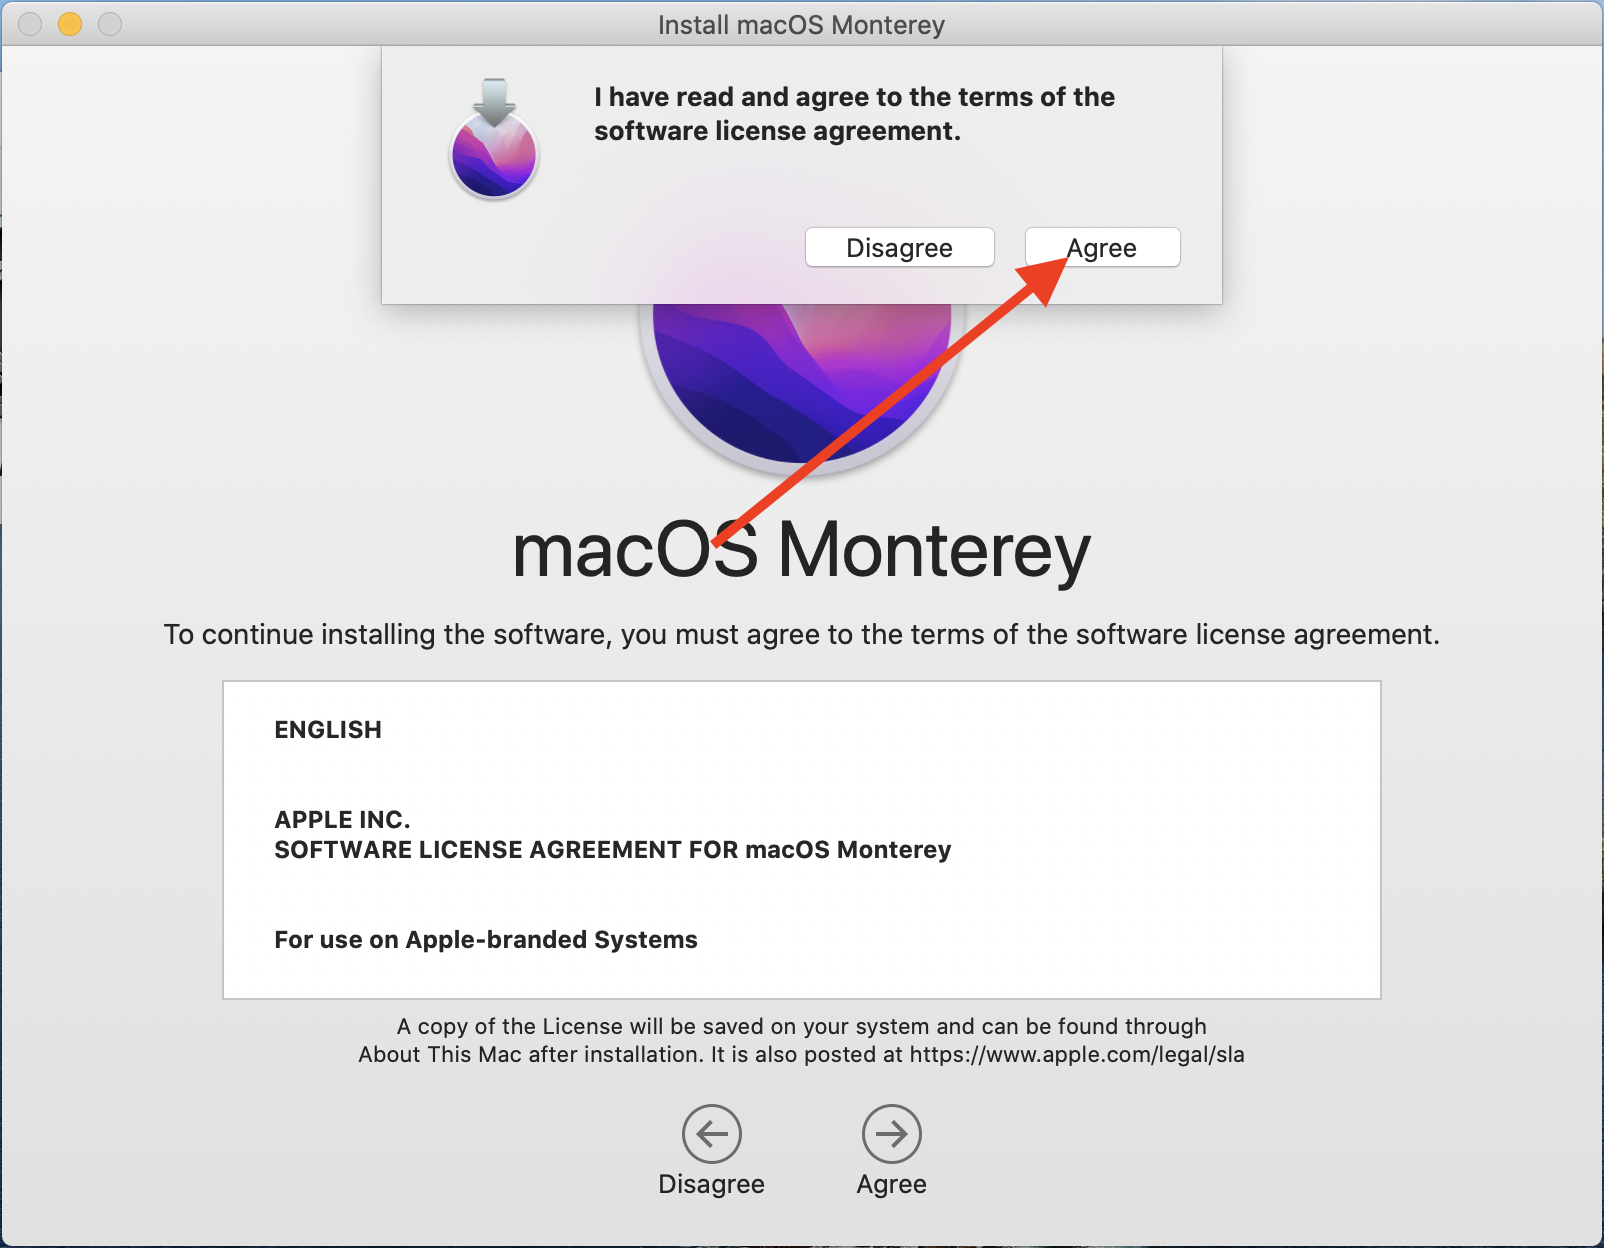
- Agree to the terms and conditions of the upgrade.
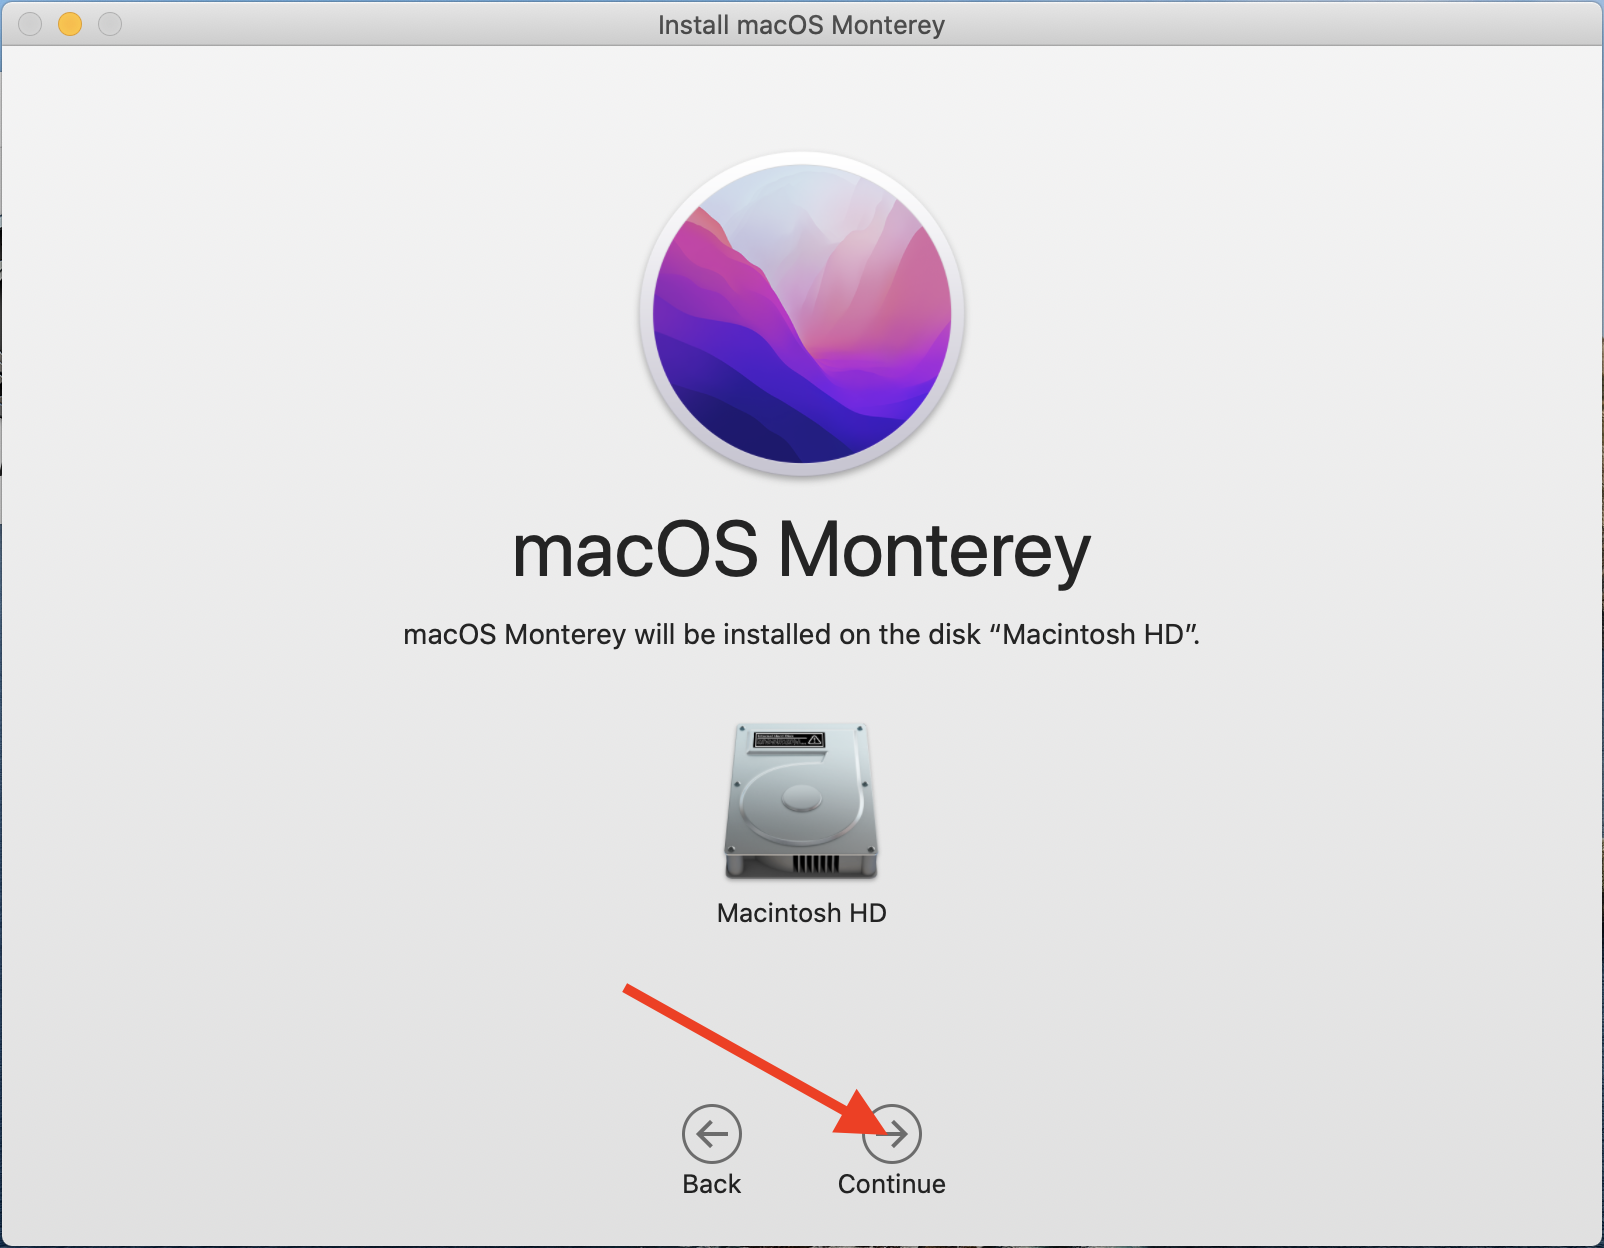
- Confirm that the upgrade will be installed on Macintosh HD and click Continue. The upgrade process will being. Your computer may restart multiple times during the upgrade process and during the upgrade, you should see a progress indicator on the screen. When the upgrade is complete your computer will return to the log-in screen.
macOS Monterey Resources
The following resources provide information about the new features available with macOS Monterey: