Print/Scan/Copy: Xerox Multi-Function Devices (MFD) Scan to Email
This article references a model of MFD that will be retired on December 13, 2021. The basic steps for this process remain the same, but the interface is slightly different. This article will be updated soon.
SOE Xerox MFDs have the ability to scan documents and send a PDF file to a user-entered email address. This functionality is available to SOE faculty, staff, and students.
The following machines have scan to email functionality.
Peabody Hall
(number in name represents the room number)
- SOE-PE-G070
- SOE-PE-1010
- SOE-PE-1028
- SOE-PE-1050
- SOE-PE-1063
- SOE-PE-1070J
- SOE-PE-2010
- SOE-PE-3028
- SOE-PE-3030
Carolina Center for Educational Excellence at Smith Middle School
- SOE-CCEE
Using Scan to Email
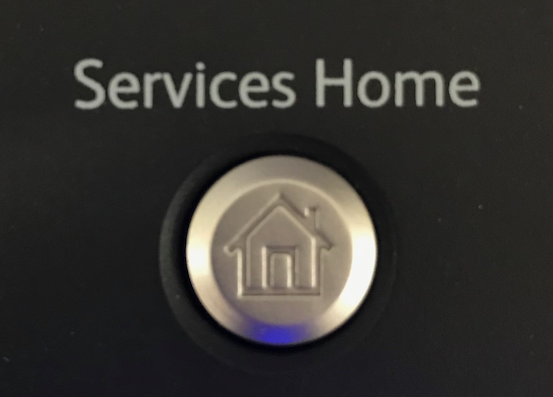
- Press the Services Home button to the left of the screen on the Xerox MDF. If the machine is in Energy Saver mode, this action will wake the machine and the Home Screen will appear on the device touch screen.
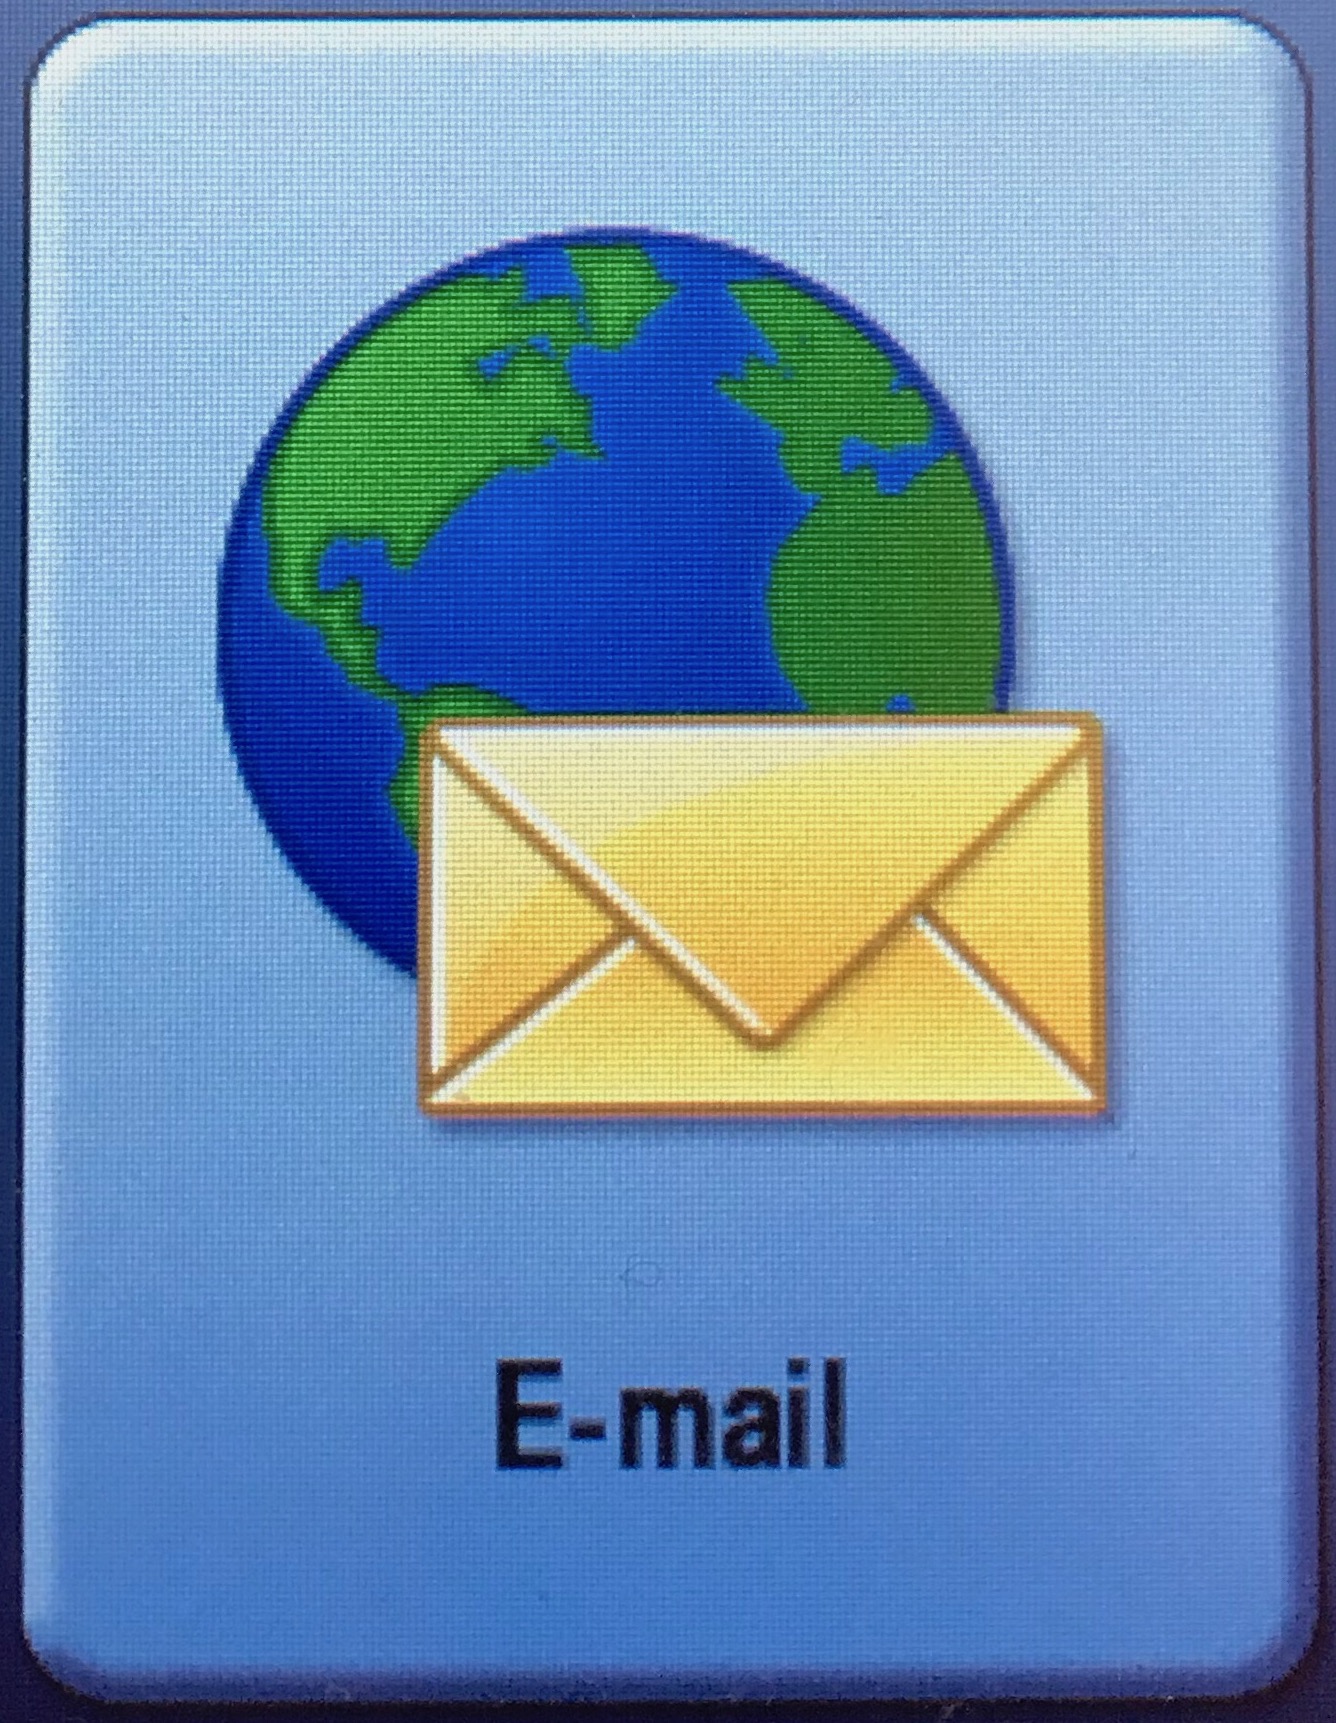
- Tap the Email button on the touch screen on the Xerox MFD. The Email Settings screen will load.
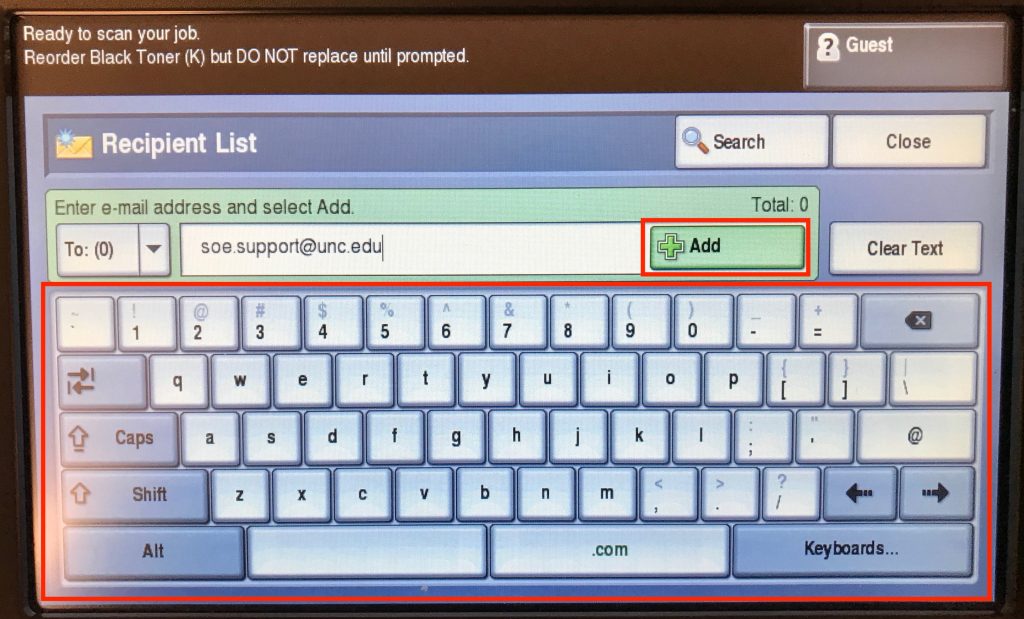
- Tap the New Recipient button. The Recipient List screen will load.
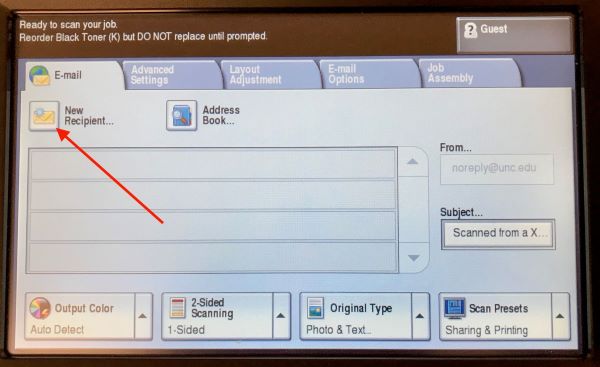
- Use the on-screen keyboard to enter the email address where you would like the scanned document to be sent and tap the Add button. Repeat this process to add additional email addresses.
NOTE: If you frequently scan to email from a particular Xerox machine, you can use the built-in Address Book functionality that will allow you to bypass entering your email address each time you scan. See the next section, Using the Email Address Book While Scanning for more information.
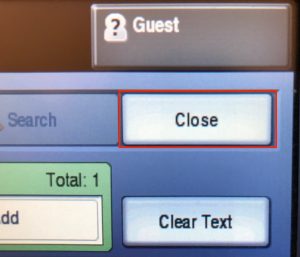
- When all addresses have been added, tap the Close button. The Scan Settings screen will load.
- Use the default scanning settings or tap the tabs that appear across the top of the screen or the buttons that appear across the bottom of the screen to adjust the scan settings.
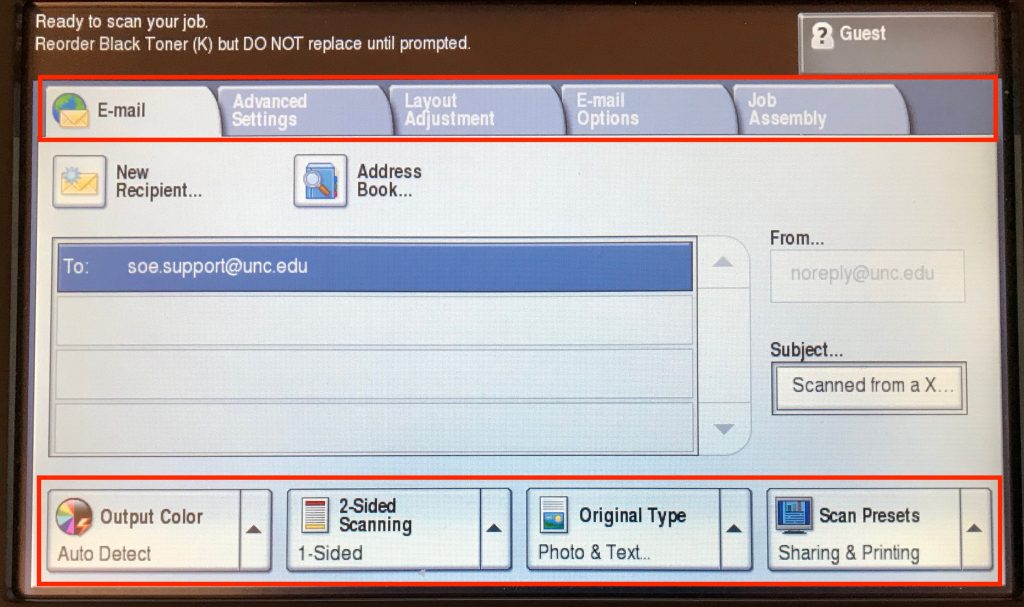
NOTE: You have the option to change the default email subject by tapping the button under Subject… on the right side of the screen.
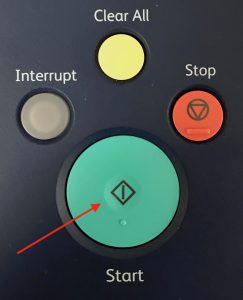
- Load the document(s) to be scanned into the document feeder and press the green Start button to the right of the touch screen to begin scanning. You will receive on-screen confirmation of the progress of the scanning. When a document has successfully been sent, you will be returned to the Scan Settings screen. Repeat this process for each document or set of documents you want to be sent to the email addresses you entered.
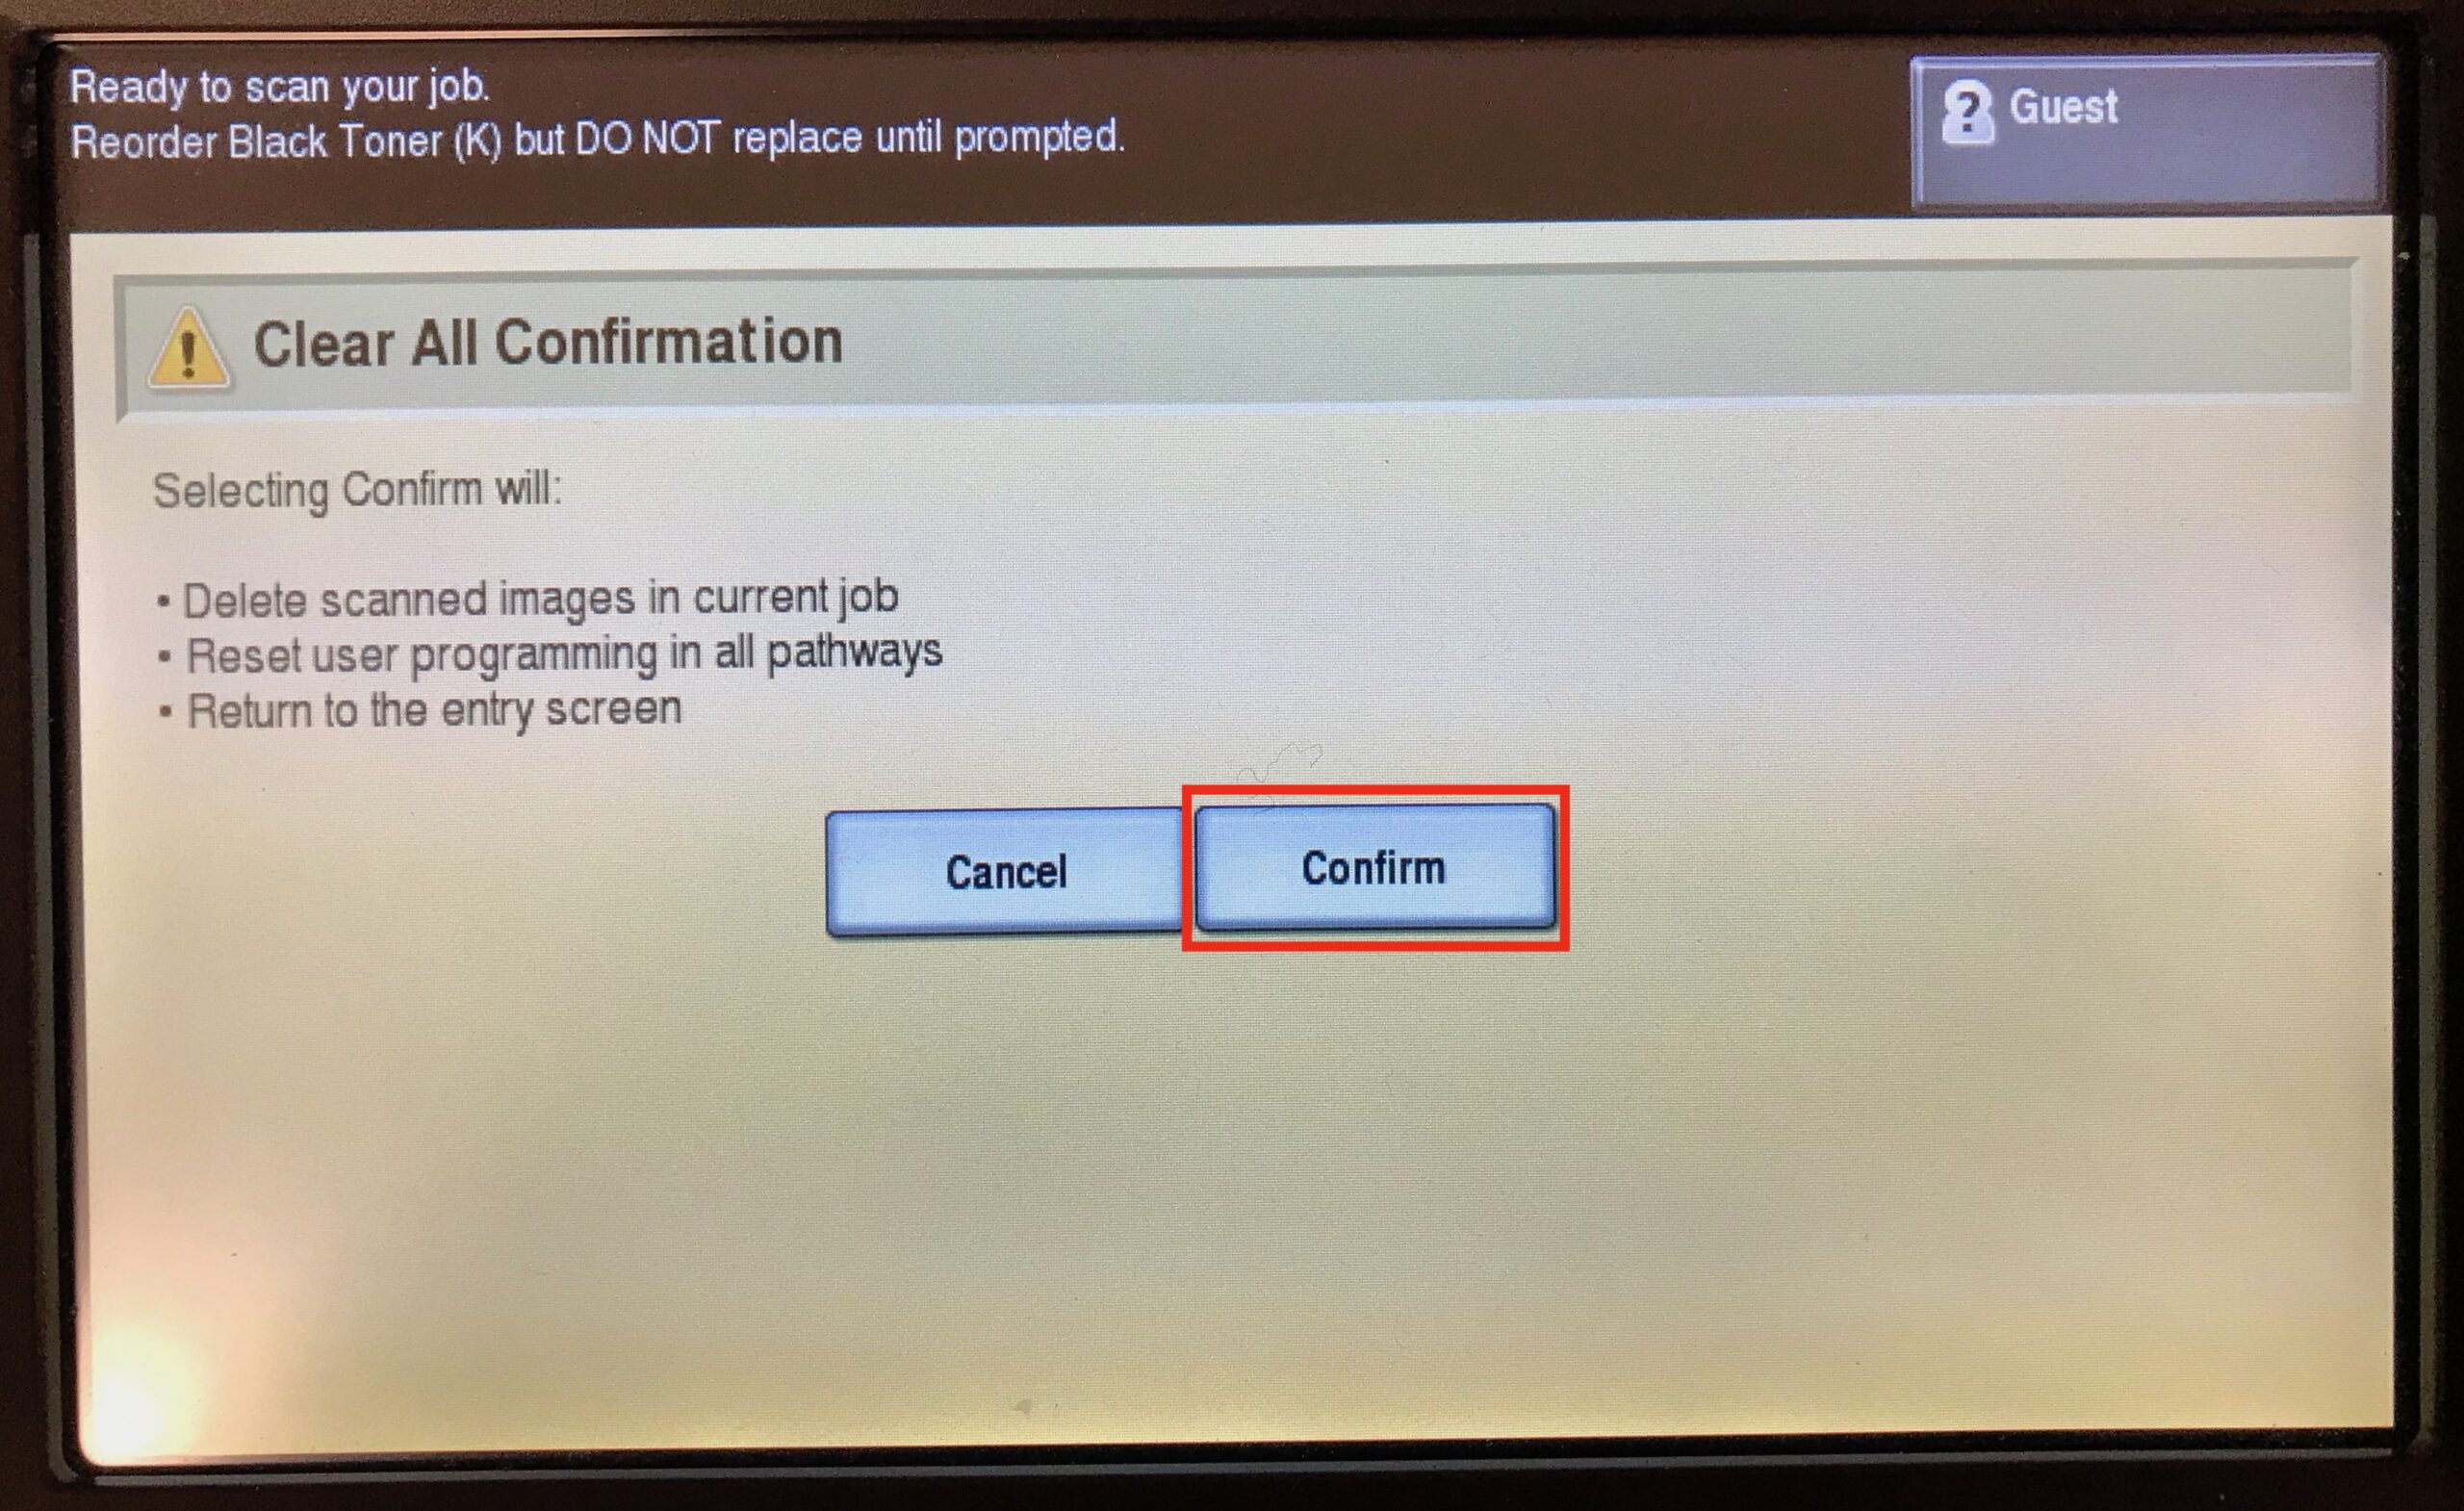
- Press the yellow Clear All button to the right of the touch screen when you are finished scanning.
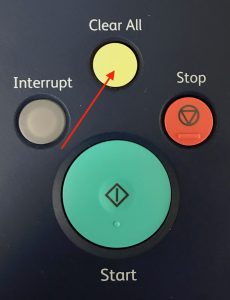
- You will be prompted with an on-screen prompt asking you to confirm that you would like to clear the machine settings. Tap Confirm. The machine will return to the Services Home screen.
- The email should be delivered to designated recipients within 1-2 minutes and will include PDF attachments of the documents you scanned.
Using the Email Address Book While Scanning
Each Xerox MFD has a built in public address book that can store regularly used email address. Contact EdIT to have your name and email address added to the address book on a Xerox MFD that you use frequently. In the request, include the name of the machine you are using, your name, your email address.
To use the Address Book feature during the scanning process:
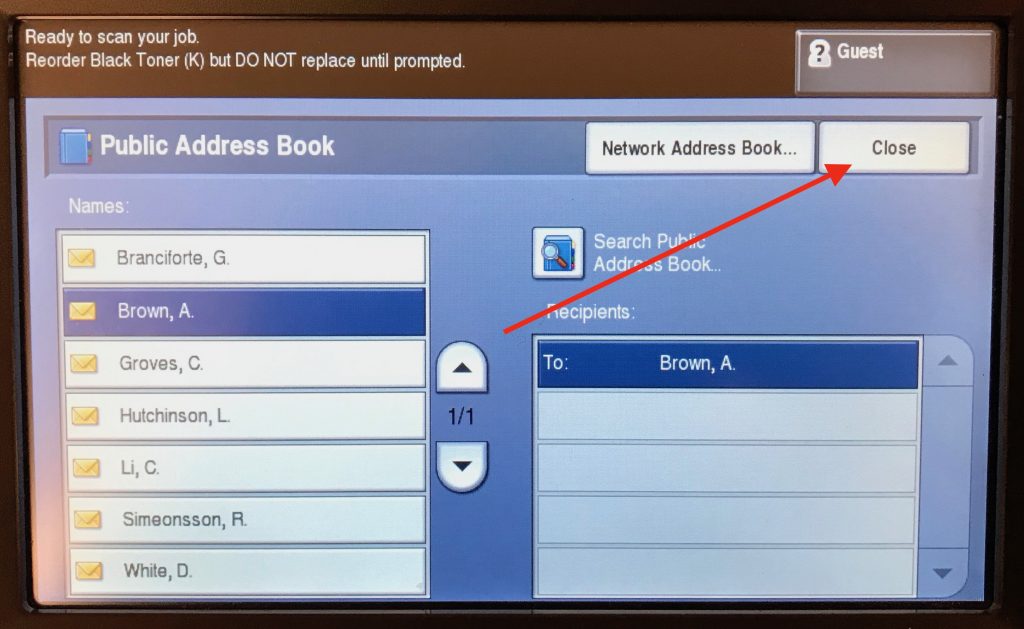
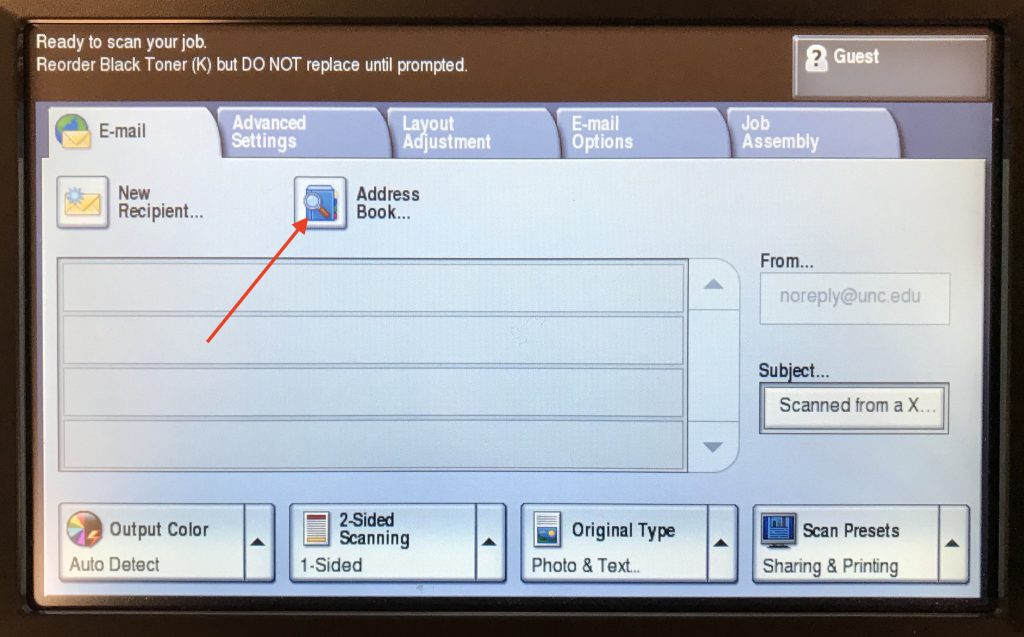
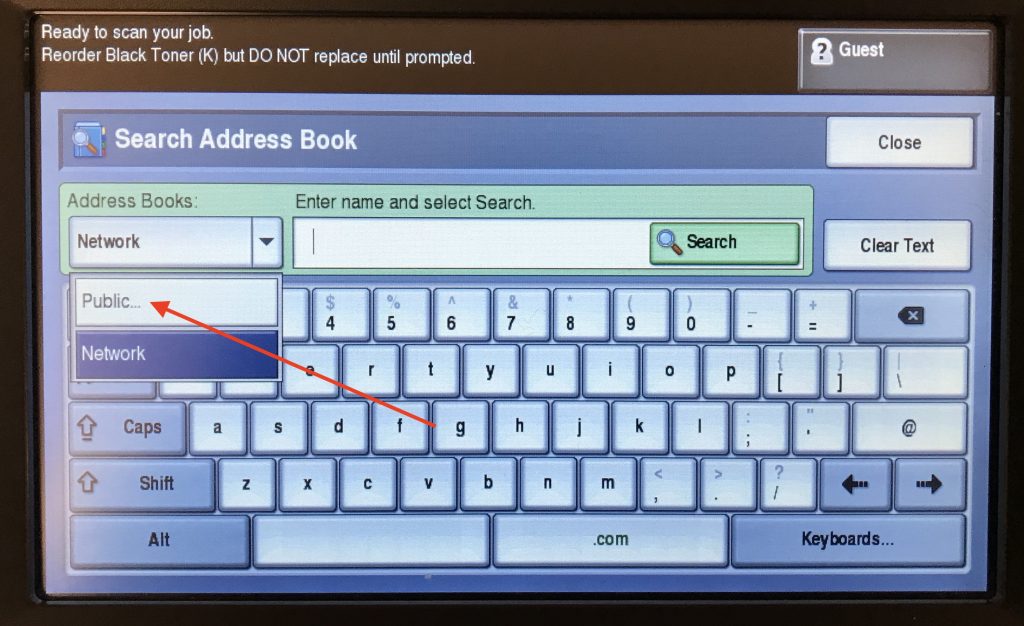
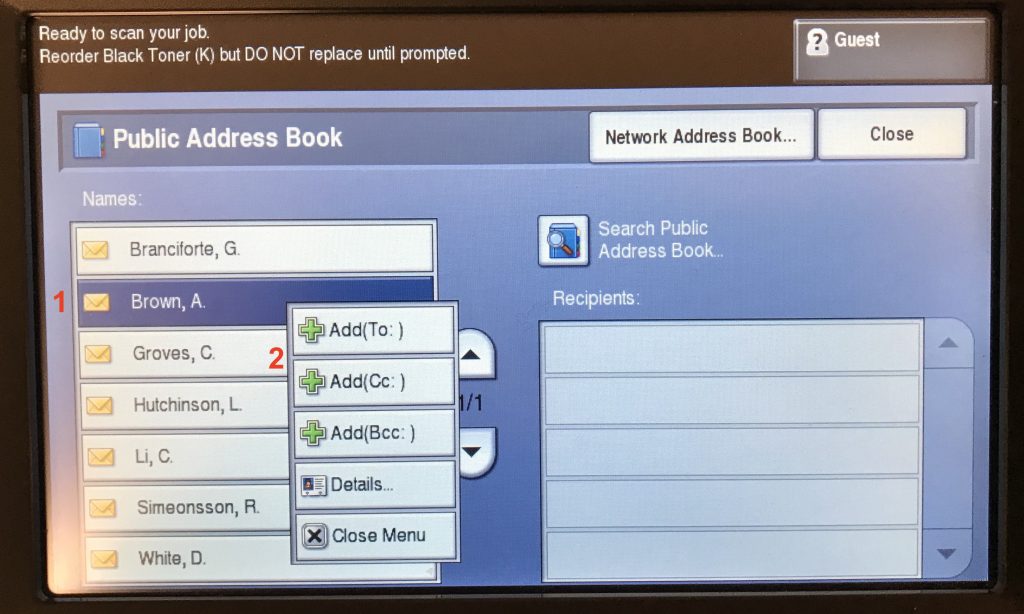
- On the Email Settings screen, tap the Address Book button. The Search Address Book Screen will load.
- Use the Address Books drop down to select the Public address book. The Public Address Book will appear.
- Select the name you would like to use from the list of names on the left and choose how you want the address to be used in the email message (To:, Cc:, or Bcc:). The address will be added to the recipients list on the right. Repeat this step for each email you would like to include on the message.
- When you have entered all of the emails from the address book that you would like to use, tap the Close button. You will be returned to the Scan Settings screen to continue with the scan to email process.